Chrome Extension是一個運行在瀏覽器中的小型應用,透過 HTML、CSS 和 JavaScript 編寫,因此只要具備前端基礎三件套就能進行開發。
本篇涉及到的 tech-stack:
- React + Vite
- TypeScript
- CRXJS
- ollama + mistral
什麼是CRXJS?為什麼要用CRXJS?
CRXJS 是專門用來開發 Chrome Extension 的工具,讓你能夠用前端框架來開發,同時又簡化了打包與權限設定的流程。
CRXJS 的優點
- 使用 Vite 快速開發 Chrome Extension
- 支援 Manifest V3
- 自動處理 manifest.json 的整合
- Hot Reload
- 自動打包符合上架格式的 .zip
npx create-crxjsProject structure
Chrome Extension 組成
一個標準的 Chrome Extension 包含以下幾個主要部分:
- manifest.json(必要)
- 擴充功能的設定檔,定義權限、加載內容、UI 等等。現在主流是 V3 版本。
- Content Script
- 注入到網頁裡的腳本,可以操作 DOM、讀資料,跟 Background 溝通,但跟原生 JS 是隔離的。
- Background
- 在 extension 背後常駐執行的腳本(V3 改成 service worker)。適合做 API 請求、監聽事件、資料轉發等等。
- 即使擴充功能的Popup關閉,它也會持續運行
- Action
- 點擊右上角 extension 圖示後出現的小視窗,就是 popup。可以當作你的 UI,跟其他 script 溝通。
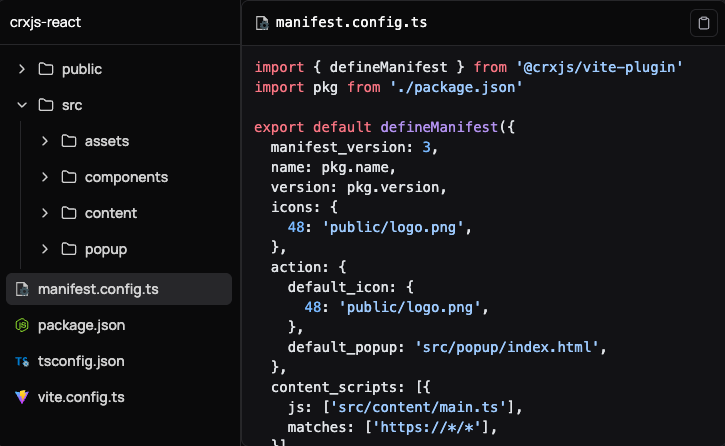
manifest.config.ts
CRXJS 不用傳統的 manifest.json,而是改用 manifest.config.ts,讓你可以寫 TS 來定義擴充功能設定,還能直接用 package.json 裡的變數。
name、version、description是基本資訊action是瀏覽器工具列圖示設定,以及點擊後開的 popup 頁面content_scripts指定要注入哪些 JS 到哪些網頁中
import { defineManifest } from '@crxjs/vite-plugin'
import pkg from './package.json'

export default defineManifest({
  manifest_version: 3,
  name: pkg.name,
  description: pkg.description,
  version: pkg.version,
  icons: {
    48: 'public/logo.png',
  },
  action: {
    default_icon: {
      48: 'public/logo.png',
    },
    default_popup: 'src/popup/index.html',
  },
  content_scripts: [{
    js: ['src/content/main.tsx'],
    matches: ['https://*/*'],
  }],
})建立與測試擴充功能
先打包一次擴充功能
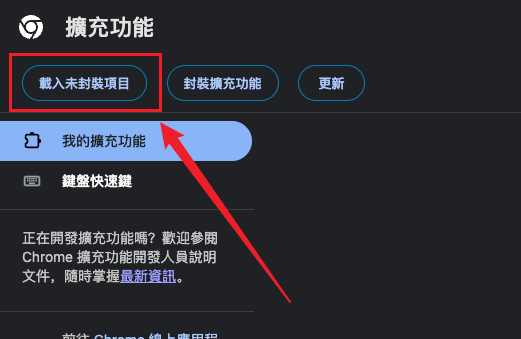
npm run build打開擴充功能頁面 chrome://extensions/,點擊左上角的「載入未封裝項目」
(如果沒有出現,記得在右上方開啟「開發人員模式」)
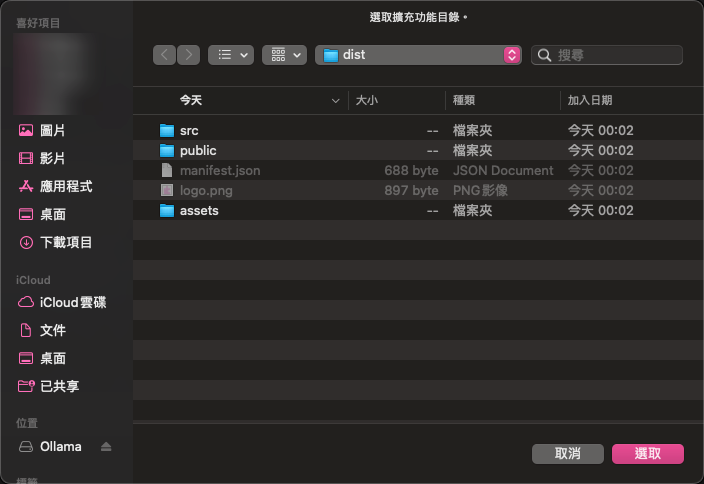
選擇剛打包好的 dist 文件夾開啟。
如此一來就能將目前的應用導入成擴充功能
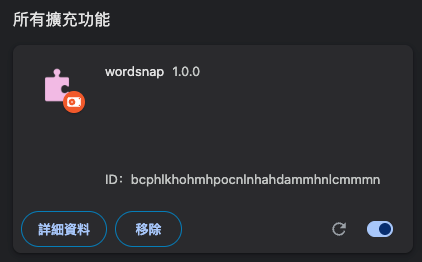
啟用後,點擊擴充功能圖示就會看到 popup 畫面(通常是 src/popup/index.html)
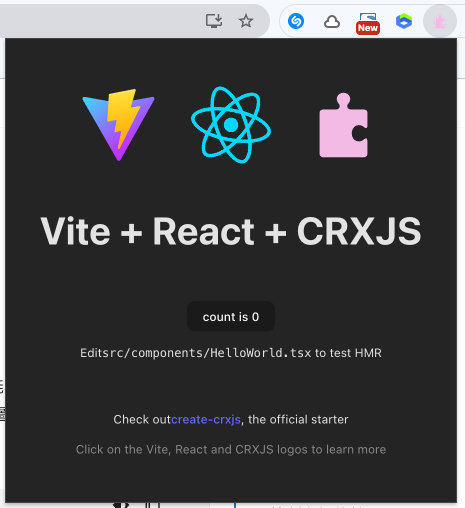
後續只要跑 npm run dev,就會有 hot reload,不需要一直重新 build,也不用重新載入擴充功能,超方便。
常見功能實作:抓取頁面中的內容 + API 請求
現在來實作一個很常見的場景:
在 popup 點個按鈕,抓取目前頁面某個標籤裡的內容(例如 <article>),然後把這段內容傳給一個本地 API 做處理。
popup 發送訊息給 content script
Popup 點擊按鈕 → 向 Content Script 發送 GET_PAGE_CONTENT 消息
// src/popup/App.tsx
const [tab] = await chrome.tabs.query({ active: true, currentWindow: true })

if (tab?.id) {
  const response = await chrome.tabs.sendMessage(tab.id, {
    type: 'GET_PAGE_CONTENT'
  })

  if (response?.success) {
    // ...
  } else {
    alert('找不到頁面內容')
  }
}content script 監聽來自 popup 的請求
Content Script 監聽消息 → 獲取頁面內容 → 返回給 Popup
// src/content/main.tsx
const handleMessage = (message, _, sendResponse) => {
  if (message.type === 'GET_PAGE_CONTENT') {
    try {
      const article = document.querySelector('article')
      let content = article?.textContent || ''
      sendResponse({ success: true, content })
    } catch (error) {
      sendResponse({ success: false, error: error.message })
    }
    return true
  }
}

chrome.runtime.onMessage.addListener(handleMessage)註冊 content script 以及設置 permissions
修改 manifest.config.ts
//popup 裡面需要獲取 active tab 並發送消息
permissions: ['tabs'],
content_scripts: [
  {
    // 所有網域都注入 content script
    matches: ['<all_urls>'],
    js: ['src/content/main.tsx']
  }
]popup 發送訊息給 background script
Popup 收到內容 → 向 Background Script 發送 GENERATE_CONTENT 消息
// src/popup/App.tsx
const startAnalysis = async () => {
  try {
    // 獲取當前活動的標籤頁
    const [tab] = await chrome.tabs.query({ active: true, currentWindow: true })

    if (tab.id) {
      // 向content script發送消息獲取頁面內容
      const response = await chrome.tabs.sendMessage(tab.id, {
        type: 'GET_PAGE_CONTENT'
      })

      if (response && response.success && response.content) {
        chrome.runtime.sendMessage({
          type: 'GENERATE_CONTENT',
          model: model,
          prompt: prompt
        })
      } else {
        alert('無法找到頁面內容。')
      }
    }
  } catch (error) {
    console.log('分析失敗:', error)
    alert('分析失敗,請重試。')
  }
}background script 處理 API 請求
Background Script 處理 API 請求 → 得到結果
// src/background/index.ts
chrome.runtime.onMessage.addListener((message, _, sendResponse) => {
  if (message.type === 'GENERATE_CONTENT') {
    fetch('http://localhost:11434/api/generate', {
      method: 'POST',
      headers: { 'Content-Type': 'application/json' },
      body: JSON.stringify({
        model: message.model,
        prompt: message.prompt,
        stream: false
      })
    })
      .then(res => res.json())
      .then(data => sendResponse({ success: true, data }))
      .catch(err => sendResponse({ success: false, error: err.message }))

    return true
  }
})雖然 background 可以繞過 CORS,但還是要記得在 manifest.config.ts 裡加上 host_permissions,否則 extension 本身還是沒被允許發送這個請求。
以及記得配置 Service Worker:
host_permissions: ["http://localhost:11434/*"],
background: {
  service_worker: 'src/background/index.ts'
}補充:在 Content Script 中請求遇到 CORS 問題
如果在 content script 中直接 fetch 本地的 API(例如 Ollama)會遇到 CORS 錯誤,因為 content script 是在網頁環境中跑的,會受到跨域限制:
Access to fetch at 'http://127.0.0.1:11434/api/generate' from origin 'https://developer.chrome.com' has been blocked by CORS policy: Response to preflight request doesn't pass access control check: No 'Access-Control-Allow-Origin' header is present on the requested resource.解決方法是把 fetch 搬到 background script 內。
Background Script(特別是 MV3 裡的 service worker)是跑在 Chrome 的 Extension 背後環境(Extension context)。當你在 background 裡發送 fetch 時,請求的來源 (Origin) 會是:chrome-extension://[你的擴充 ID],這就不是一般網頁了,它屬於 Chrome extension 特有的上下文,不會受到 CORS 限制,因為它被視為一個特權環境(privileged context)。瀏覽器信任這個背景環境,因此允許它直接發送跨域請求。
| 問題層面 | Content Script | Background Script |
|---|---|---|
| 執行環境 | 跑在網頁中,像一般的 JS | 跑在 extension context,是特權環境 |
| 請求來源 (Origin) | 是「目前網頁的網址」 | 是 chrome-extension:// 開頭的 internal origin |
| 是否受 CORS 限制 | ✅ 有,像一般網頁 | ❌ 沒有,幾乎都可以送出 |
| 適合處理什麼 | 操作 DOM、讀網頁內容 | 做 API 請求、儲存資料、統一處理邏輯 |
補充:Ollama API 403 Forbidden
Ollama 默認只允許來自 localhost 的請求,background script 發出的請求 origin 是 chrome-extension://...,這導致 Ollama 拒絕請求並返回 403 錯誤:
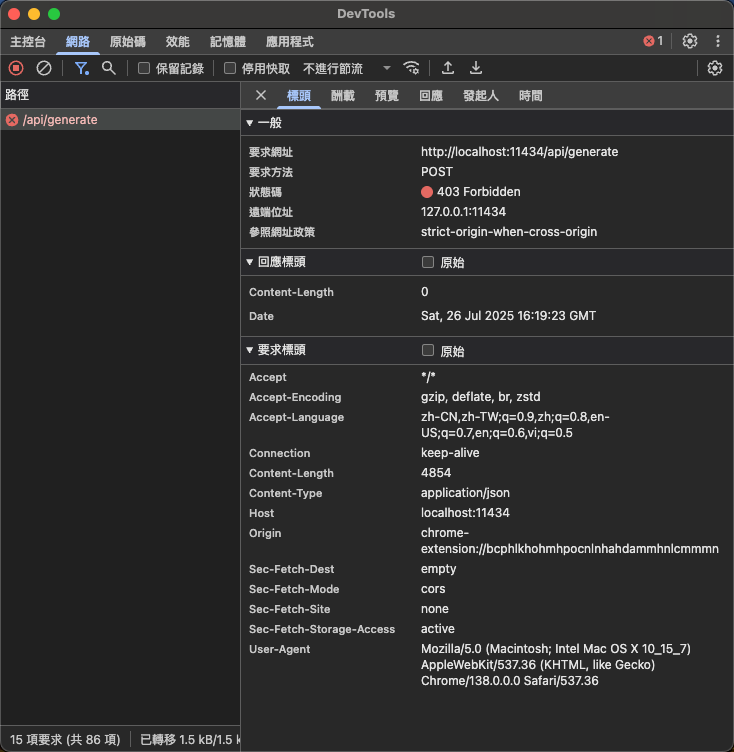
解決方法也很簡單,通過設置 OLLAMA_ORIGINS 環境變數來允許 Chrome 擴展的請求即可:
OLLAMA_ORIGINS="chrome-extension://*" ollama serve


![[React] Redux Toolkit Query(RTKQ) 基礎使用指南 13 RTKQ logo](https://www.may-notes.com/wp-content/uploads/2023/12/nl9bkr5l1h5ke31vkula-150x150.webp)
![[React筆記]使用 Visx 製作可互動的折線圖表 14 [React筆記]使用 Visx 製作可互動的折線圖表](https://www.may-notes.com/wp-content/uploads/2025/07/visx-geometry-120x120.png)
